How to Install a NATO Watch Strap
Thread order, two-layer design, and why it works — in under 5 minutes.
 How to Install a NATO Watch Strap
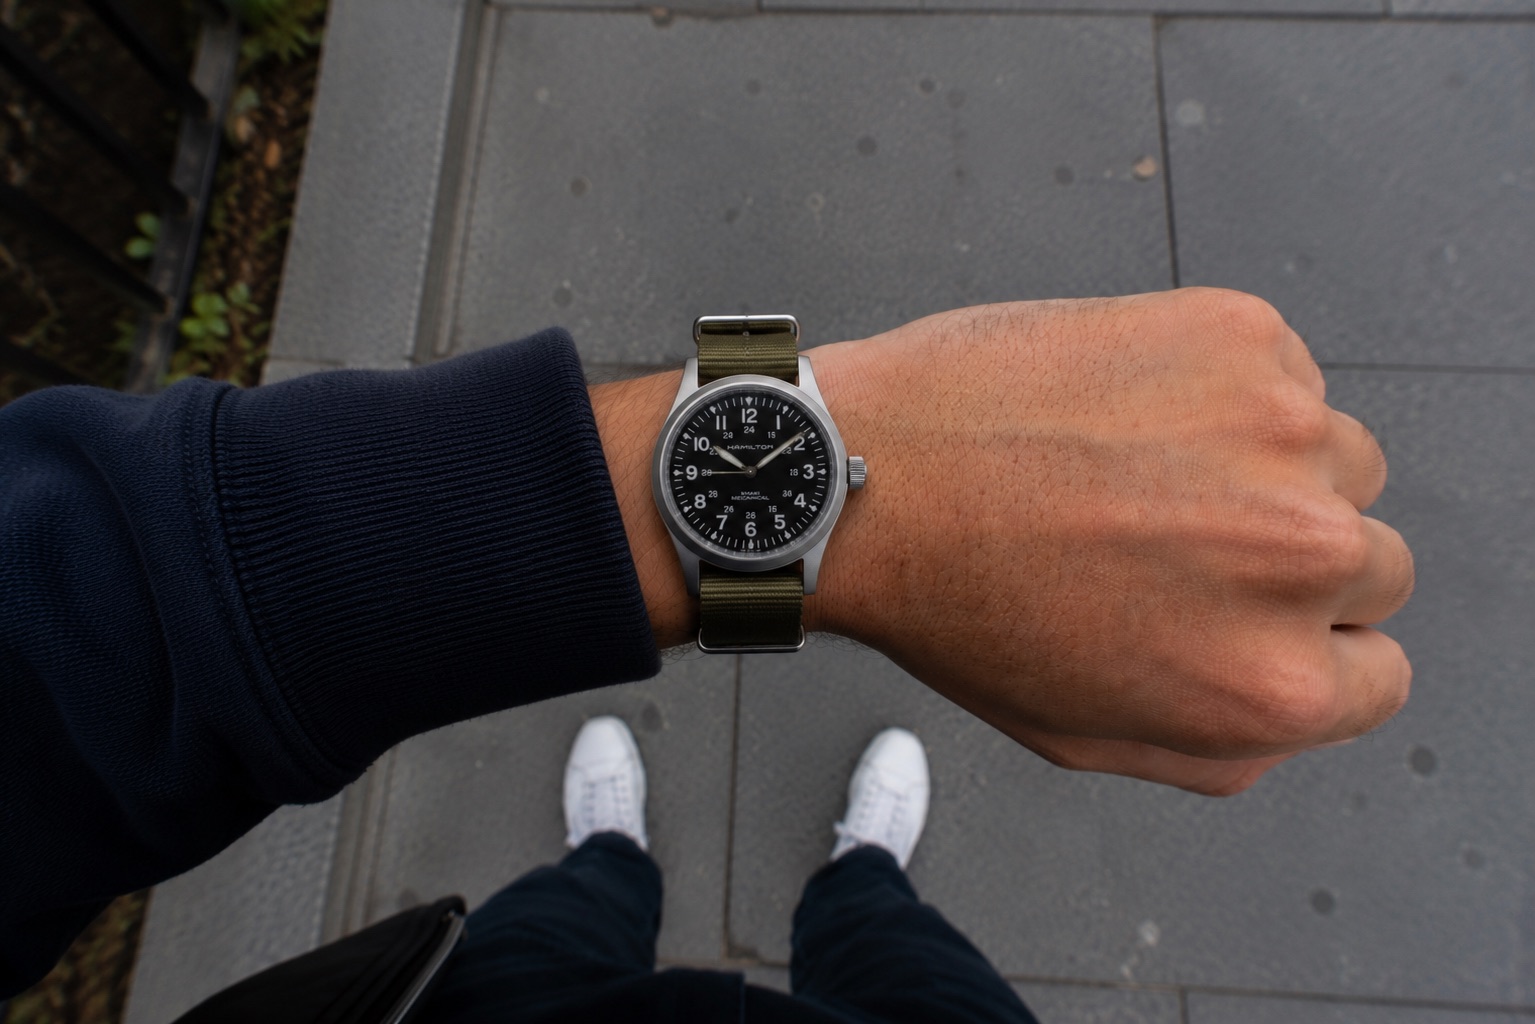
NATO straps don't work like standard watch straps. They're a single continuous piece of nylon that threads under the watch case, creating a two-layer design that keeps the watch on your wrist even if a spring bar fails. Threading it correctly takes about two minutes the first time. The thread order matters — an incorrectly threaded NATO looks off and doesn't function as intended.
What makes NATO straps different
A standard watch strap attaches directly to the spring bars — one piece on each side of the case, each held by one spring bar. If a spring bar fails, the watch falls off. A NATO strap is a single long piece of nylon that passes completely under the watch case between both spring bars. The watch case rests on top of one layer of nylon, with the spring bars sitting inside the strap keeper loops. A second layer of nylon passes between the case and the first layer as part of the threading. This means even if one spring bar fails entirely, the watch is still suspended by the nylon passing under it — the watch stays on your wrist. This safety feature is why the design was specified by the British Ministry of Defence in 1973 and why it became standard issue for military watches.
What you need
Just the NATO strap. No tools required — NATO straps thread around the existing spring bars without removing them. If your spring bars are not installed in your watch (newly purchased), you'll need a spring bar tool to install them first. For a watch that currently has a different strap attached, you can either leave the spring bars in place and thread the NATO around them (recommended and easiest), or remove the spring bars first and reinstall with the NATO threaded — both work, but leaving the spring bars in place is simpler for beginners. One 20mm NATO strap fits any 20mm lug width watch — the strap is designed to fit through the standard lug gap.
Step-by-step threading guide
Starting position: the watch face-up with the 12 o'clock position away from you. The NATO strap has two sections: a long tail (the main strap that goes through the buckle) and a short tail (the shorter keeper section). 1. Feed the long tail end of the strap through the gap between the watch case and the 6 o'clock spring bar, from right to left (or left to right — direction depends on how the buckle faces, but stay consistent). 2. Pull the long tail all the way through until the first rectangular ring keeper is close to the spring bar. 3. Pass the long tail back over the top of the case from the 6 o'clock position to the 12 o'clock position. The strap now loops under the watch, over the top, and the long tail is at the 12 o'clock side. 4. Thread the long tail under the 12 o'clock spring bar, from the outside toward the case. 5. The short tail (the second keeper section) now passes over the top of the case from 12 o'clock toward 6 o'clock, through the second ring keeper on the long tail, and under the spring bar at 6 o'clock. 6. Thread the long tail through the buckle and adjust fit.
What a correctly threaded NATO looks like
When correctly threaded: the watch case sits on top of one layer of the strap, elevated slightly from the wrist by the nylon thickness. Looking at the dial side, the strap passes cleanly under the case at both spring bars with no twisting. The strap lies flat against the wrist — no bunching or folding. The rectangular ring keepers sit close to each spring bar. The short tail section is visible between the case and the buckle, passing as a second layer over the top of the first layer and through the keeper. Correct threading feels slightly firm under the watch — the two layers create a mild stacking that some wearers notice initially but adapt to quickly. A twisted or incorrectly threaded NATO will have visible nylon folding at the spring bars or will sit unevenly under the case — if the result looks off, unthread and start again from step 1.
Common mistakes and fixes
Wrong thread direction: if the buckle faces the wrong way on your wrist, the strap was threaded in the opposite direction from step 1. Unthread and start in the other direction. Skipping the keeper: if the second short tail doesn't pass through the second ring keeper on the long tail, the watch has no safety layer — this defeats the main functional purpose of a NATO strap. Twisted strap: happens when the long tail is fed through a spring bar gap with a twist. Unthread completely, lay the strap flat, and rethreaded from scratch. Too-long tails: NATO straps are often quite long and leave visible tail excess under the buckle. This is normal — thread the long tail through all three keepers (the two ring keepers and the end keeper near the buckle tip) to tuck the excess. For smaller wrists, some buyers trim the strap end with scissors and seal it with a lighter to prevent fraying.
Frequently asked questions
How do you put on a NATO watch strap?
A NATO strap threads under the watch case between the spring bars rather than attaching directly to them like a standard strap. The basic thread order: feed the long tail under the spring bar at 6 o'clock from one side, pull through, pass over the dial at 12 o'clock, feed under the 12 o'clock spring bar, then pass the short keeper section back through the rectangular ring keeper and under the 6 o'clock spring bar to complete the loop. The watch case sits on top of one layer of nylon with a second layer underneath. A correctly threaded NATO takes 1–2 minutes and requires no tools. The watch should sit slightly elevated from the wrist by the double nylon layer, which is normal.
Do you need a tool to install a NATO watch strap?
No tools are needed to install a NATO strap if spring bars are already in your watch. NATO straps thread around the existing spring bars without removing them — you're feeding the nylon through the gap between the case and the spring bar, not releasing the spring bar from the lugs. If you're starting with a watch that has no spring bars installed (bare lugs), you'll need a spring bar tool to install the spring bars first, but after that initial setup, all NATO swaps are tool-free. This makes NATOs ideal for collectors who swap straps frequently — you can change from a NATO to a leather strap (tool required) or from one NATO color to another (no tool) in under two minutes.
Why does my NATO strap make the watch sit high on my wrist?
NATO straps add 2–4mm of elevation compared to a standard two-piece strap because the double nylon layer under the case creates extra height. This is a characteristic of the design, not a fit problem. Most wearers adapt within a day or two and stop noticing. The elevation is more pronounced on thicker NATO straps (2mm+ nylon) and less on thinner ones. If the elevation bothers you, a single-pass NATO (a strap style that threads similarly but uses only one pass under the case) reduces the height while keeping most of the safety feature. Alternatively, a ZULU strap threads identically to a NATO but uses slightly thicker hardware that can feel more secure if the regular NATO feels too flexible at the spring bars.
What's the difference between a NATO and Zulu strap threading?
NATO and Zulu straps thread identically around the watch case — both pass the strap under the case at both spring bars with the watch sitting on top. The difference is in the hardware: a NATO strap uses three rectangular ring keepers, while a Zulu uses one or two solid O-ring keepers (round metal rings rather than rectangular). The Zulu's solid ring keepers sit tighter against the spring bars, which some wearers prefer for a more rigid feel at the attachment point. The NATO's rectangular keepers allow more strap movement at the spring bars. For most watches and wrists, the two feel very similar once adjusted — the choice is mainly aesthetic.
Find a dupe for a specific strap
Paste a product URL from any premium strap brand and we'll match it to affordable alternatives.
Try the tool →